
As of this past Sunday, it is officially Spring (YAY!). I just love this time of year for so many reasons. It is starting to get warmer, the sun is shining, flowers are blooming, etc, etc.! So in the past few weeks I have been putting away the last of my winter decorations and brining out some fun color and spring decor! But then I realized I still had a Christmas wreath hanging on my door, and nothing to replace it. Solution: make my own spring wreath! So my bestie and I made a day out of making our own fun spring wreaths! It was so easy and pretty inexpensive as well! Stay tuned to find out how we did it!
Supplies:

Grapevine wreath: $4.99 at Michaels
Flowers of your choice: I chose tulips (4 bundles)
Letter of your choice
Ribbon (wired is best)
Hot glue gun & glue sticks
Wreath wire
Step 1:


The first thing I did was lay my wreath out and apply the flowers how I wanted them. For mine, I wanted the tulips to go in different directions. So I took two bundles for the top and staggered them to give it a little dimension, then I took the other two bundles and turned them the opposite way, still staggering them. To secure the stems, I used the wreath wire to attach them to the wreath itself. Where the stems come together is where I will put the ribbon so it doesn’t matter to much if you can see them.
Step 2:
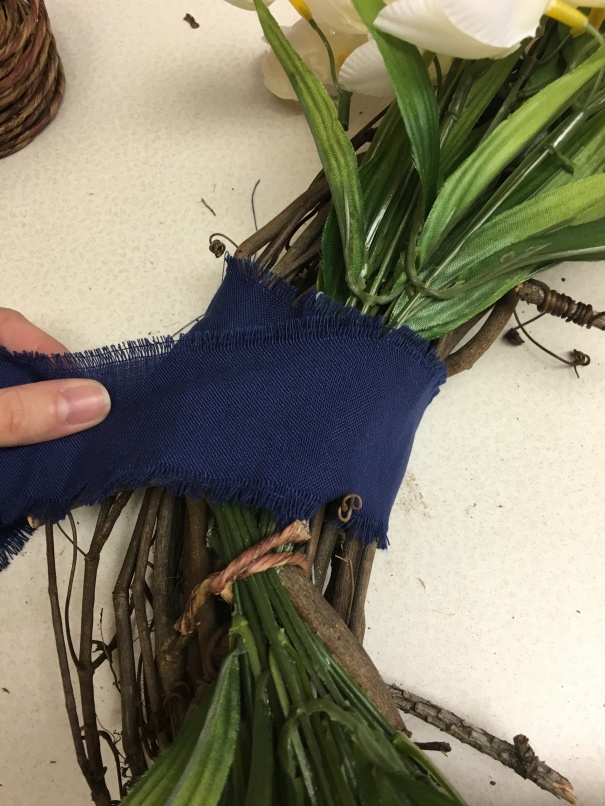
Apply ribbon: Because the area where the stems came together was quite big, I decided to wrap some of the ribbon around the stems and wreath to help secure them a little more and to cover up the empty space.


For the ribbon, I decided to just make a single bow. As you can see in the picture, you make an upside down triangle with the ribbon, and let the ends overlap. Then you pinch the middle together and shape your bow. *This is where wired ribbon is the best* The ribbon I picked out was not wired and made my bow a little flimsy. I am still happy with it, but if I had to do it again, I would definitely use a wired ribbon.

Once my bow was how I liked it, I secured the middle with a little twine and just hot glued the back of it. Then, using hot glue, I simply attached my bow to the ribbon on the wreath.
Step 3:

Add your initial. This is a super fun way to personalize your wreath! You can use your first name initial, or your last name, whatever you want! You can find these letters at any craft store in all shapes and sizes. You can even paint it if you choose, but I decided to keep mine white to go with my white tulips! I simply hot glued the letter right to the wreath!
Step 4:

Hang it up! See how simple that was!? I love how this turned out. The colors are so fresh and clean for spring, I love it! It took us maybe an hour at the most to make our wreaths, it was so easy!
I hope you all enjoyed this DIY! I encourage you all to try making your own wreath! They are also great ideas for upcoming Mother’s Day gifts! There are so many variations you can do!
❤ Rylie

OMG did something like this with hydrangeas! I love your tulip idea though!! Going to head to Michaels and try it!
LikeLiked by 2 people
My friend that made one with me used hydrangeas and it turned out super cute! I love that there are so many possibilities!
LikeLike
Gorgeous and so easy!
LikeLiked by 1 person
Thank you! It was so easy and fun 😊
LikeLiked by 1 person
Great idea!
LikeLiked by 1 person
Love it! Super cute! 🙂 xo
http://alifyalifestyle.com/
LikeLiked by 1 person
Thanks!
LikeLiked by 1 person
absolutely beautiful! great job! 🙂 xx, Annie | Annie’s Beauty
LikeLiked by 1 person
Thank you!
LikeLiked by 1 person
So beautiful!
LikeLiked by 1 person
Thanks!
LikeLike
My friend and I did this last Spring. Yours turned out so lovely!
LikeLiked by 1 person
Thank you! Isn’t it fun?! 😊
LikeLike